.
.
.
.
.
.
.
.
.
.
.
.
.
.
.
.
.
.
.
You've somehow reached an old version of this page! Link to our new updated pages here - www.GardenPossibilities.com/newmarket-gardening.html
For more
gardening tips for York Region gardeners, also browse the "Dirty
Knees"
pages. I no longer email a newsletter, but there's lots
of helpful tips there from past newsletters.
Index
in calendar order.
~ Jan. 2001
Seed Starting, An Act of
Confidence.
~
April 6th, 2009
Cheater Bulbs. My secret spring weapon!
~ Dec.
2008
SNOW! The best insulator.
~ April
5th, 2007
first signs of menopause?!
~
March
13th'07
Good Planting Design
~
Jan.10th'07
Freeze/Thaw rescue
~ Feb.15th
'04
Give Me More Snow!
~
Feb.
8th '04
Forcing Branches
~
Jan. 24th '04
winter solstice.
~
Dec. 28th '03
keeping your Poinsettia healthy.
~ Dec. 15th '03
winter catalogues
~ Nov.
30th, 03
leave frost killed plant debris ...
~ Nov.
9th, '03
chop leaves for garden mulch - don't bag 'em!

Here's
a collection of how-to, when-to, or just-for-fun articles I've
written over the past 20 years, to inspire your 2018 gardening
efforts. Use the index to the right to browse
topics.
Enjoy! Evelyn Wolf
Gardening in the northern York
Region area.
North of around Hwy 7 we're on the colder side of zone 4/5
and gardeners have more challenges than our GTA colleagues
to the south. Fewer frost free days and extreme
temperature swings at the beginning and end of winter often
frustrates those of us who like to challenge the zone
boundaries in our plant choices.
At some point I'll get these articles organized in some kind of
seasonal fashion for easier access, but for now, browse through
the list to the right, and I know you'll find a few useful tips
to take out to your garden.
NEWMARKET GARDENING
|
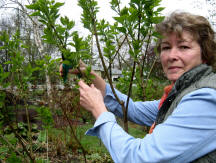
 Hyacinth, April 6th, 2009. I
bought them potted and ready to bloom and
"planted" them. A bit worse for wear
once the snow melted the following week, but
they kept going and will bloom again at their
natural time in spring 2010.
Hyacinth, April 6th, 2009. I
bought them potted and ready to bloom and
"planted" them. A bit worse for wear
once the snow melted the following week, but
they kept going and will bloom again at their
natural time in spring 2010. April
6th, 2009
How to get bulbs blooming earlier than
usual? Cheat!
In the fall when it's the correct time to plant all the wonderful spring bulbs, it seems just too far away for me to get excited. (I'm not a very patient gardener.) My creative juices are generally too pooped out by September to work up any enthusiasm to think through the possibilities, and besides - it was a full 6 months ago when whatever bulbs I have already bloomed, and I can never remember where they are, or more to the point, where more are needed.
What do I do instead? Well, when excitement and anticipation is high in early spring, the grocery stores and garden centers are right there to fill the need with lots of Hyacinth, Tulips, Daffodils and more - already up and ready to bloom. You can do much more with these spring treasures than put them on the kitchen table to tide you through the last few weeks before your garden starts to pop!
During those teasing warm spells in spring I purchase lots of these ready to bloom pots, chip a hole in the semi-thawed ground and plant them! Sometimes they are knocked down in just a couple of days by the return of winter weather, but just as often, I get at least 2 weeks of something colourful in my garden when all else is tan and brown. Worth every penny of the $7.99 it cost me, and although I've been very cruel to these poor guys by subjecting them to this extreme, they will regroup and be fine next year to bloom when they should. (The Hyacinth in the picture were planted two weeks ago and although their struggle is evident in some of the leaves, they quickly adapted and are putting out an additional bloom or two and most of the leaves stayed strong enough to do the job of feeding the bulb for next year.). They use terrific top sized bulbs for these spring pots, so rather than the $7.99 being a self-indulgent waste, it was actually a bargain!
I call this my Cheater Bulbs routine and get a little thrill from the thought that neighbours may think that I'm some kind of garden magician with the power to manipulate even the natural spring blooming schedule! (Unless they catch me planting them of course!).
Happy spring everyone! Evelyn
April 5th, 2007 Evelyn Wolf
Is Mother Nature entering Menopause?!
Perennial plants NEED a cold winter to stay safe during their
dormant period. We had record cold temperatures for
February and so far, April has been well below normal.
What’s the problem then? The record WARM temperatures we
had in January and March!
In central Ontario our early spring weather is usually erratic but 2007 saw temperature extremes more severe than any in my gardening memory. A warm spell in January lasted long enough to cause alarm among horticultural experts with reports coming in from all over southern Ontario of buds beginning to swell on trees and shrubs and even a few spring bulbs popping.
When winter finally arrived in mid January we quickly dipped down to normal temperatures and had good snow cover, and I thought we just may have nipped disaster in the bud. (excuse the pun – I couldn’t resist!)
The February thaw we always experience just plain didn’t happen. Instead Mother Nature kept all her warm thoughts bundled up and concentrated on a late March warming that, again, lasted much longer than usual, sending the signal to plants that spring had firmly arrived. Wouldn’t it have been wonderful had this been true!
But alas, it was too good to be true as it is also routine for us to experience many last blasts of winter in April. But our plants didn’t know this so in the sunshine and +10ish temperatures of late March flower buds on trees and shrubs broke dormancy and perennials started showing themselves above ground.
There’s no doubt we’ll see the effects of these extremes on many early blooming plants such as magnolias, forsythias, elderberry, and rhododendrons with lots of flower bud damage. It may have been a deadly situation for some roses, viburnums and newly planted shrubs. Even a few of the late spring bloomers such as crabapples, lilacs, and some fruit trees may have experienced some flower bud damage.
It isn’t just gardeners that may be affected by this unhappy situation though. Flower bud damage on fruit trees may show up in the price we’ll pay for fresh fruit later this summer since reduced flowering, of course, leads to reduced crop yields. Depending on cultural practices (winter mulch protection, or not), the strawberry and other small berry harvests may also be affected. The extent of the damage depends on plant species and the stage of plant development just before the cold April temperatures hit with a bang. Let’s cross our fingers! Not much else to be done.
In my Newmarket garden, thankfully no shrubs had yet unfolded their leaves and flowering perennials for the most part had poked their noses up only fractions of an inch, but sunny exposures in gardens to the south may have prematurely warmed enough for leaf damage to also occur.
Overall your spring plants may behave poorly this year with dead flower buds and perhaps freeze burned foliage, but don’t panic and rush out for any plant-problem-fix-its. The culprit is simply Mother Nature in a particularly bad mood this spring and your plants will recover and leaf out again. You may need to wait until next year to see a good full blooming on some shrubs again though. If any of your plants have been severely affected, extra TLC this summer during drought spells and perhaps a few shovel fulls of compost will help them recover.
I’m not normally one for burlaping or otherwise protecting shrubs during the vulnerable period of March & April, but this cross-my-fingers attitude will cost me dearly this year! In the rush to plant up my new garden last fall, plants were put into the ground without the appropriate care and I didn’t get a compost mulch on until just recently. This test-the-limits approach teaches me a lot about plant adaptation and survival techniques that serves me well in the gardening classes I teach, but boy – this year my gardening lesson probably bears a hefty price tag. I’ll see just how many plants succumbed to this extreme see / saw winter in a few weeks, but the heaved root balls and browned buds all over my new garden certainly don’t look promising. Check in with me later this month when I’ll yet again pass on words of wisdom learned from hard experience!
Happy Spring! Evelyn
March 13th, 2007
Steps
to Good Planting Design
Designing a mixed
perennial and shrub garden bed is easier to feel confident about
if you think of it not as a collection of individual beautiful
plants, but as a collection of vignettes – smaller groupings of
plants that compliment eachother through contrast or harmony to
create a single picture within the larger canvas of your garden
bed.
Each vignette should have
plants with different flowering times and seasons of interest
and also have as much contrast in foliage texture or colour as
possible. For each flower favourite try to find a foliage
companion with a different bloom time.
Here’s one classic
example. Early tulips (late April), late tulips (May),
with forget-me-nots (late May) as an underplanting. A
white edged Hosta and ferny leaved Astilbe close by will be only
inches out of the ground but will be ready to take over the
space for June when the forget-me-nots can be removed and tulips
cut back.
Hosta and Astilbe will be
your July bloom while their foliage phase alone makes a lovely
duo in the meantime. A white flowered Japanese Iris added
to this group will bloom in June and echo the white in the Hosta
leaves and add another element to the foliage contrast.
By August all flowering is
finished in this group but the foliage contrast alone is keeping
this spot looking good. A clump of Purple coneflower added
as a backdrop will offer August and September bloom and some
height. The Coneflower seedheads and the foliage of the
Japanese Iris will stand tall all winter through the snow for
winter interest.
In this one tightly
planted group you have a miniature garden within a garden
looking good at all times. Surrounding it could be a
low groundcover plant like Dianthus to help the vignette
pop. You’re aiming at creating plant groupings that
stand out.
To create a harmonious
larger picture, the garden bed itself, a few all season
vignettes like these should be repeated through the bed.
Each group becomes a focal point that gives the illusion of the
garden being larger, but the eye still moves comfortably from
group to group to take the whole picture in.
Developing an eye for planting design comes step-by-step
and grows with your expanding knowledge of the huge assortment
of plants available today. Train yourself to look at a plant’s
form (mound, upright, fountaining) and foliage texture (ferny,
fuzzy, bold, strappy), not just its flower colour.
When you get dressed in the morning, you choose the main
item you want to wear and then choose either a contrasting or
matching item to wear with it.
Then perhaps a bit of jewelry in scale with the outfit
completes the picture.
In a garden you’re using the same sense of matching, contrasting, decorating, etc. to design individual pictures that come together to create the whole. Make notes as you go and think of mistakes as learning opportunities and move on. There is no right and wrong to art, and garden design is art. Like all art, it takes practice, keen observation, and learning more about your tools – the plants.
Evelyn Wolf
January 10th, 2007, ©
Evelyn Wolf
El Nino, Climate Change, or Jack Frost took a
Nap!
Whatever the reason, this warm weather is
definitely not good for our gardens!
I’m of two minds about how I feel about this unusually warm
weather so far this winter.
As a winter hibernating, cold weather hater, what can
I say? - loving every hatless and gloveless day!
As a gardener though, I’m already lamenting the death
of many perennials and shrubs I planted last fall.
Hardy perennial plants
don’t tolerate winter, they NEED to go through
a dormant period in the climate conditions they are adapted to,
and that means tucked in under a blanket of snow with roots safe
and stable in the frost locked ground.
Sure doesn’t look anything like that out my
window!
Here it is, middle of
January, and not only is the ground free of snow, it isn’t even
moist from melted snow. And ground frost?
Certainly none in my garden!
Normally when we experience a winter warm spell
(usually late January), we’ve already had many weeks of below
zero temperatures to get the frost well settled into the ground. Soil surface then
thaws to create a muddy mess (that is, if you haven’t mulched),
but refreezes quickly before much crown rot damage can occur.
So far this winter, it has
been one step forward and two steps back, with the ground
freezing only an inch or so before yet another set of warm days
thawed it out. In
this indecisive weather, plants become just as indecisive and
can’t make out whether it’s time to grow or stay tucked in. Reports are coming in
of - crocuses trying to bloom, robins sited, tulips up, ravens
building nests, pussywillow buds out, worms active in surface
soil, violets blooming, elderberry buds swelling, grass still
growing. Confusion
everywhere! Some
plants are so out of synch they may not sort it out in time to
prevent damage.
If buds break dormancy or
spring plants start to, well … spring, they’ll be turned to
moosh once we inevitably get down to sub-zero temperatures. New plantings are
susceptible to literally heaving out of the ground when ground
frost isn’t stable. Aside
from crossing your fingers and hoping for a good dump of snow to
finally come, here’s a few protection tips -
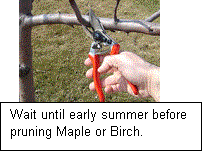 1)
Don’t prune Maple or Birch until it’s consistently
sub-zero since this warm weather may have triggered an early
start to their sap run. Better
yet, wait until early summer when they’re leafed out and the
spring sap run is over.
(Sap flow is triggered by air temperatures fluctuating above and
below zero, which is normally what March is about, not
January!).
1)
Don’t prune Maple or Birch until it’s consistently
sub-zero since this warm weather may have triggered an early
start to their sap run. Better
yet, wait until early summer when they’re leafed out and the
spring sap run is over.
(Sap flow is triggered by air temperatures fluctuating above and
below zero, which is normally what March is about, not
January!).
2)
In dry garden areas where the ground is still
completely frost free, give
shrubs, evergreens in particular, a good root soak to make sure
that when the ground finally does freeze there will be moisture
at hand for roots to take up during the critical spring thaw
time when plants are breaking dormancy.
3)
Check anything you planted last fall to see if they’ve
been pushed up by the coming and going of frost.
Don’t do further damage by pushing them down right now
– do that in spring. For now pile enough soil, compost, evergreen branches, or
whatever you have, around the heaved plant to protect exposed
roots.
 4)
Mulch, mulch, mulch!
Mulching with compost (compost, not top soil) is the
answer to many garden problems and December is the usual time to
protect the soil surface from exposure to sun and periodic
winter warm spells and the resulting freeze/thaw cycle.
If you haven’t done this yet, do it now!
Insulating garden soil with mulch is about the only
thing we can do to moderate the effects of more temperature
swings, and using compost will feed the soil at the same time. I
usually use the course grade ½” compost from Miller Compost, but
for now use anything you have around – leaves, evergreen
branches, whatever. Just
get that soil covered before more crazy temperatures take their
toll.
4)
Mulch, mulch, mulch!
Mulching with compost (compost, not top soil) is the
answer to many garden problems and December is the usual time to
protect the soil surface from exposure to sun and periodic
winter warm spells and the resulting freeze/thaw cycle.
If you haven’t done this yet, do it now!
Insulating garden soil with mulch is about the only
thing we can do to moderate the effects of more temperature
swings, and using compost will feed the soil at the same time. I
usually use the course grade ½” compost from Miller Compost, but
for now use anything you have around – leaves, evergreen
branches, whatever. Just
get that soil covered before more crazy temperatures take their
toll.
happy winter gardening! Evelyn
Dirty Knees,
from Feb8th04 by Evelyn Wolf
Reap Bloomin’ Rewards from Winter Pruning! :
Forcing spring bloomers to bloom early indoors.
I love spending February in the garden pruning.
I could do it in March, but it’s hard to wait that long
before getting up close and personal with my plants again.
As one of the first necessary outdoor gardening tasks, it is
another calendar checkmark that moves us with increased
anticipation toward spring.
February pruning not only breaks the winter blahs but is
also the time when you can really see the structural framework
of your trees or shrubs and prune for repair and improvement.
With a few exceptions, this is the best time for general
maintenance pruning.
If the plants you’re pruning are spring bloomers, there's a
bonus to be had! Putting the cut branches through a simple
treatment to trick them into blooming early indoors is another
wonderful way to get some winter gardening gratification.
Here’s what to do.
Forsythia, Magnolia, Cherry, Crabapple, Lilac, Pussywillow,
Witch Hazel, Dogwood, Apple, etc. – any tree or shrub whose
natural flowering time is early to late spring is a candidate
for forcing.
It's a pretty straightforward procedure with the only
critical ingredient for success being timing.
Candidate branches must have at least six weeks
of freezing temperature before the embryonic flower buds formed
the previous autumn at the leaf nodes, will be willing to break
dormancy.
This brings us to more or less now – February, as the earliest
cut branches can be forced to flower.
March is fine, and probably better for late spring
bloomers like lilac, but earlier than mid-February may result in
shriveled barren branches instead of blooms.
Select young but strong branches approx. ½” diameter and
cut them to a desired length.
Look for ones that have lots of plump buds.
Flower buds are rounder and fatter than leaf buds, but
if they’re too small to tell the difference just trust that by
choosing branches that aren’t too small or too old you’ll have
flowers.
Cleanliness is important since, just as with cut flowers in
the summer, it is bacteria allowed to enter the wound area that
shortens vase life.
Dipping your bypass pruners into a weak bleach solution before
trekking outdoors will do the job.
Keep cut branches outdoors and out of the sun until
you’re ready to put them through the following treatment. Tucked
under a blanket of snow is perfect, and as long as they are
protected like this they can wait a day or two.
Back inside where it’s warm, fill a sink or tub with water
as hot as your hands can take.
Bring in only as many branches at a time as will fit in
your sink and put them immediately into the hot water.
Keeping the cut ends underwater at all times, re-cut
them at an extremely slanted angle to maximize the interior
surface area exposed to water.
For very plump or very long branches make a 1” cut up
the middle of the stem end to expose even more interior surface
area.
Use a clean sharp knife and remember to keep at least the
stem ends underwater at all times.
Immersing the entire branch during this procedure is
ideal, but not often do-able.
While your branches are waiting in their soaker bath, fill
a clean bucket with warm water and mix in floral preservative as
per label instructions and 1 tbsp of Listerine per quart of
water.
This will promote water uptake and slow down bacteria growth.
Adding a few drops of essential oil of Lavender will assist the
bacteria killing action and make the whole experience that much
more pleasant.
As quickly as you can without making a huge mess, move your prepared stems from the tub of hot water and put the cut ends into this bucket of preservative laced warm water
.
Your branches are now ready for use but will take two to three
weeks to fully open their flower buds.
You can leave them in the bucket of preservative in a
cool place until the buds begin to open, or arrange them in a
sturdy vase positioned in a prominent place where all can watch
the beauty of spring unfold.
To maximize vase life keep your bucket or vase out of
sunlight and change the water every few days for a fresh mix of
preservative and warm water.
Mist occasionally, keep them as cool as possible, and
enjoy!
© Evelyn Wolf 2004
Dirty Knees, from Feb. 15th, 2004
SNOW! SNOW! Give Me More Snow! by Evelyn Wolf
I am not a winter person. I don’t ski, I don't skate, I don’t skidoo. I don’t build snowmen with the kids. I arrange for someone else to take them tobogganing. If the snow piles up in the driveway I just crash through with my car rather than shovel it.
Generally I just gripe and growl my way through winter. But as a gardener I recognize that snow is a necessary evil. I know it is the best insulation to keep my plants safe in a cold winter – the thicker the blanket, the better.
We often point to our double-digit sub-zero temperatures as the culprit when we face plant fatalities in spring, but it isn’t the severe temperatures, it's the severe temperature fluctuations. In particular, a premature warm period that is just long enough to thaw the top inch or two of ground and prompt dormant buds to break dormancy, followed by a return to sub-zero.
In a hardy perennial plant all is well as long as they are dormant since they are perfectly capable of surviving cold temperatures to a particular point (their zone tolerance), but as soon as warm weather cues them to break dormancy and begin their new growth cycle they are as vulnerable as a new born baby. Woody plants suffer the most since warm weather triggers a cell alteration and draining of the antifreeze that has protected the branches and buds from freezing so far, and perennials sensitive to crown rot are forced to sit in the mud and often don't make it.
I often hear complaints of spring flowering shrubs with plenty of flower buds that begin to swell with the promise of plenty of blooms, only to have them shrivel and die. The flower buds made it through the -20 degrees of December/January, but once they broke dormancy in a premature warm spell, the modest -5 degrees that followed did them in.
This is 50% of the reason that mulching is a good idea in our climate – as an insulating protection that moderates the effects of the freeze/thaw cycle of late winter. For the most part our gardens are thickly insulated with snow right now, and as long as it stays that way, all should be well.
Good snow cover can’t be counted on in our part of the world however.. With the influences of our unique geography, it is normal for south central Ontario to experience severe swings in temperature that make it one of the most difficult places to garden in all of the temperate world (zones 7 – 4).
This is the only time I can be dragged out with borrowed gloves and boots to shovel snow. The thaw is only a week or two away if patterns hold true, and if I pile enough snow on top of the existing layer in the garden beds, it just may end up being a thick enough layer to keep the frost in the ground, where it belongs, even after many days of above zero temperatures that melted the snow on the lawn and driveway.
The best thing you can do to help your garden jump vigorously to life once spring arrives is to get out there now and pile on as much snow as you can. Gather it from wherever it is, and pile it high.
If you salt your driveway or walks, be careful to leave that snow where it is. The salt build up can severely burn plants. Also, the snow that is near a busy road may have accumulated toxins from all the car exhaust fumes, so leave it be as well.
I’ll never forget the look on a neighbour's face one winter when he saw me shoveling the snow off my lawn and into the garden. I know he wanted to ask me why I was shoveling the lawn instead of the driveway, but I had already established my reputation as a nutty gardener so I guess he figured I was just winter crazed!
As I’m writing this, big fat flakes of snow are falling, and I’m smiling. As long as my car can still make it through the snow ridges and valleys that are the geography of my driveway at the moment, and I don’t have to go out and shovel it, I’m content. Maybe, just maybe enough snow will fall so that I don’t have to do even that one plant rescue shoveling!
Dirty Knees, from December 2008 e-newsletter
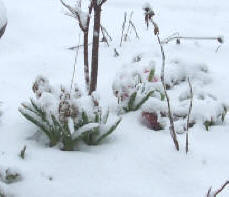
SNOW
! The Best Garden Insulator.
Perennial
plants NEED a cold winter to stay safe during their
dormant period. What they definitely don’t
appreciate though is winter indecision on Mother
Nature’s part!
Come January we can expect temperatures to
fluctuate enough to cause all our early season snow to
melt, The bare ground is then exposed along with
the sensitive crown area of our perennial plants.
Not good.
In an ideal hardy plant’s world, when temperatures drop they stay dropped, and when temperatures rise again in spring, they stay risen. Unfortunately, in our unique climate zone pocket of the northern GTA, January and early February temperatures swing us around on a thermostatic roller coaster ride. Perennial plants aren't designed to tolerate this freeze / thaw.
Early season snow that stays put is the best
insulation for your garden. In our usual January or
February thaw though, the snow cover melts away. If
the warm temperatures continue for even just a few extra
days, the soil surface begins to thaw too. Melted
snow can't drain away since a few inches down the ground
is still frozen. This can mean death for some perennials
and small shrubs since their crown then sits in a muddy
mess and rots.
The best thing you can do for your garden in December is
pile on the early snow high - around roses and any broad
leaved evergreens in particular. When the mid winter
roller coaster ride starts, with just a bit of luck the
snow’s depth in your garden is thick enough to not
completely melt away. Plants stay safe in their
frozen and insulated nest until spring.
Who knows what the balance of this winter will bring. Winter 2008 we had the best snow cover in memory. Winter 2007 we had the worst see/saw temperatures in memory. (Update: Winter 2009 was a happier medium. 2010? Well in 2010 we didn't have much of a winter at all!) When it snows, pile as much snow on your garden as you can. When it thaws too early, try shading the ground with evergreen boughs or whatever you can until more snow comes.
Or, do what I do - simply cross your fingers and hope the tenacity for life built into most of our best garden plants sees them through! If crossed fingers don't work, well ... gardeners are inherently optimistic spirits - if a plant succumbs to difficult conditions ... well ... it's not so bad in the end. It opens up a space for that new plant you always wanted!
Evelyn Wolf, Garden Consultant & Seminar Speaker
GARDEN POSSIBILITIES SERVICES.
Dirty Knees, from Jan. 24th '04
The real beginning of spring has already past!
Buried deep in all the harried exuberance of Christmas, there was a different sort of marker date for gardeners - a beacon we look to for reassurance that green growing things will, in fact, return one day. Dec. 21 -- the winter solstice.
It may sound a bit nuts, but this just might be the most exciting day of the whole year for gardeners since it is the first day of the new gardening season. On this day, the shortest day of the year, our cups (or watering cans, I guess), become half full rather than half empty. We can look forward to a new garden, not backward at the old. Daylight hours are beginning to increase and are unfailingly leading us toward the first stirrings of spring.
Gardening in January is all about the joy of anticipation. Seed catalogues are arriving in the mailbox; early spring issues of favourite gardening magazines are going to press loaded with news of new plants to try; the annual horticultural convention that kicks off the business season for garden centers gets the industry in gear for the new season; and wholesale nursery growers are switching on their greenhouse lights to start production of all those colourful annuals we'll be buying in just a few months.
It may be -20 C outside, but we're at the post and the countdown is on! That's right -- spring is on the way!
Another one of my futile attempts to lessen the agony of the long wait till spring? Maybe. But in many ways the gardening season actually has begun, since the excitement of planning is at least 50% of the pleasure of gardening.
Seed orders have been mailed; plastic pots sterilized; bags of potting soil wait in the laundry room. Cannas, Geraniums and Calla Lily can be brought out of the cold cellar soon and potted up. Charts, new planting plans, need/want checklists are being drawn up, and at least two revisions have already been made to the design sketches for the new perennial border ... which, of course, will be revised again once those early spring issues of the gardening magazines hit the kitchen table extolling the virtues of all the new plants coming to market in just a few months. (Has there ever been a more perfect garden than the one imagined in the dead of winter?)
A gardener's spring is not around the corner - it's already here!
Will any of this planning, plotting and seed-starting actually result in a more beautiful and bountiful garden this summer? Probably not. Most of the plans will be revised yet again once the frenzy of the active gardening season arrives in spring, and there just won't be room for the 3 trays full of seedlings you were sure you needed.
There will be stronger plants at the garden centre promising earlier bloom than the ones that struggled on our window sill from seed, and all the new vegetable varieties will probably sound tastier than the ones chosen from the seed catalogues. Inevitably there will be an even deeper purple Heuchera that we just have to own, and the lively chartreuse of yet another new Hosta may inspire a completely different planting scheme than the one you so painstakingly sketched out over winter.
Is all this January planning a wasted effort? Not at all. All of this sketching, researching, seed starting, and catalogue gazing is keeping the vision of colourful flowers and glossy greens alive during the bleak monochrome of winter - a lifeline for the plant addicted. Carpets may get soiled and the windowsill stained, but scanning the catalogues, starting plants from seed, or fussing with overwintered tubers keeps our fingers in the dirt where they feel most at home. We're maintaining that vital link of being active participants in the awe-inspiring journey through another full circle of the miracle of life.
Now what can be nuts about that!
© Evelyn Wolf, Jan, 2004
Dirty Knees,
from Dec.
28th 2003, on
rescuing
a fading poinsettia for next Christmas,
Q. I saved my Christmas poinsettia from last year
and while it is strong and healthy, it doesn't have any
blooms. What did I do wrong?
A. While you can give your Poinsettia a new life as a foliage shrub for the summer garden, frankly, getting it to bloom again for another Christmas is not worth the trouble. (Closet darkness, black plastic bags, daily doses of an exact amount of light, for an exact amount of weeks, high temperatures followed by cool temperatures, fertilizing, repotting, special pruning, magic wands, eye of newt, etc.).
Getting a
Poinsettia to bloom again isn't as simple as with other types
of plants, since the huge scarlet heads are not actually
flowers, but bracts – coloured modified leaves that surround
the tiny cluster of bud-like flowers in the center of the
rosette of red leaves. Who knows why this alternate
method of attracting pollinators was devised by Mother Nature,
but there you have it – another example of nature's wondrous
diversity.
Poinsettia
(Euphorbia
pulcherimma) is a large shrub native to the sunny
ravines and hillsides of Mexico. Commercial growers use
a wide assortment of special treatments to adjust bloom time;
keep them compact; produce larger blooms than would
naturally occur; and in recent years producing them in white,
pink, spotted, etc. Poinsettias, as we know them, are
virtually a man made plant that bears little resemblance to
the plant as it appears in the wild.
If you want to keep your Poinsettia alive and healthy as an outdoor shrub, or as a houseplant, it is a straightforward procedure, but it will become a plant that looks very different from the compact colourful potted plant you originally bought.
In the wild,
Poinsettia enters a dormant period after bloom time, triggered
by the warm dry season. Its bloom time is tied to the
shortening daylight time of autumn and winter. Your task
now is to mimic these drought conditions and trick your plant
into taking the dormant rest period it needs to come back
strong, and to shake off the effects of all of the artificial
treatments it went through in its youth. (At the
blooming end of the lifecycle, 14 hours of absolute darkness
per day for 8 weeks is necessary in the autumn for it to
produce its colourful bracts. This is the part that
seems more trouble than its worth!)
To start the
process of rescuing your plant, slow down on watering, letting
it almost dry out in-between, until it has dropped all its
leaves. At this point stop watering altogether and cut
the stems back to just 3 - 4 inches above soil
level. Store the plant as-is, in a dark corner at
average room temperature, keeping the soil just one notch up
from bone-dry. (A trick I use to keep just that bit of
moisture in a plant's environment while dormant, is to put it
in a paper bag and put an unbruised apple in the bag along
with it.)
Around late
March you'll see it try to put out new growth, signaling the
end of the dormant period. It's now time to help it
"wake up". Repot in fresh soil with good drainage;
bring it gradually into the brightest spot you have, but not
direct sunlight; start watering - only a bit at first
and more as it grows faster. Once growth is rapid,
fertilize with a general plant food at half the recommended
strength and keep the soil evenly moist but not too
wet.
At this point
it's ready to put out in the garden, but you have to wait
until all danger of frost is past. Keep the light as
strong as you can to ensure that branches don't get stretched
out and leggy. If you have the time to fuss, put it
outside on warm spring days and bring it in at
night.
Once the danger
of frost has passed, you can plant it out in your garden in a
partial shade to full sun position. Expect a 3'-4' shrub
with deep green leaves tinged with a bit of red at the veins
by mid-summer. It won't "bloom", but it makes an
attractive foliage backdrop for some favourite flowers.
Now here's the
magic wand bit. If you want to try your hand at getting
it to bloom again, here's the general instructions, but you're
unlikely to get "blooms" anywhere near the size you're
familiar with.
Follow the
above procedure, but plant your poinsettia in a pot instead of
in the garden. Fertilize regularly at half the
recommended strength to ensure a vigorous and strong stemmed
plant. In June give it a hard pruning back to produce a
more compact plant. In late September start the 14 hours
of darkness per day treatment for 8 weeks. I have never
tried this myself, but I'm told that this really needs to be
complete and uninterrupted darkness, which is where the black
plastic bag comes in. It needs to be in a consistently
warm place during this time. Once it is "blooming" keep
it in a coolish place out of direct sunlight, and don't
overwater.
There you go! The cycle complete.
Cheers! Evelyn
© Evelyn Wolf, Dec., 2003
Dirty Knees,
from Dec.15th
2003,
on catalogues,
poinsettias, etc.
For the time being, active gardening is on hold while we
prepare for Christmas. It will be a long wait, but our
gardening catalogues, books and houseplants will get us
through.
It seems garden
seed catalogues are arriving earlier and earlier each year in
their bid to get your attention before the competition, but
their arrival in the middle of the distraction of Christmas
preparation only spoils the fun and excitement of their
arrival for me.
These usually
full colour, enticing catalogues are much more welcome in
January when the snow is deep and spring still months
away. In fact they are not just welcome, they're
essential to winter sanity. With hot toddy in hand and a
sketch pad by my side I can immerse myself in planning next
years possibilities, and the world feels right
again.
If you don't
receive any gardening catalogues you're missing a real
treat. While I have spent my entire adult life
protecting my address from any company that may put me on a
mailing list, I happily give my address out to any garden
related business.
In your flurry
of Christmas shopping, take a few minutes to watch for the
Dec./Jan issue of CANADIAN GARDENING Magazine or ONTARIO
GARDENER Magazine. They both put together excellent
lists in this year-end issue, of companies all across Canada
who offer seeds, plants and products through mail
order.
Probably the
best one spot source of anything to do with gardening is the
annual gardener's journal TORONTO GARDENER'S JOURNAL &
SOURCEBOOK 2004. It is a privately produced and
published journal whose "yellow pages" section is updated each
year and includes everything from gardens to visit and
recommended magazines to specialty plant nurseries, organic
products, or unique garden ornament in the greater Toronto
area.
Armed with any
of these three source guides, the gardening world is at your
finger tips! Get yourself on as many lists as possible,
and spend an afternoon with a gardening friend in January
pouring through the catalogues. You can save a lot of
money sharing an order with a friend since most seed packages
contain far more seed than you can use, and often there is a
discount for larger orders to take advantage of. (It is
also good to have a friend on hand to prevent you from
ordering enough seed to plant all the beds in Newmarket as can
easily happen with all the enticement!).
One word of
caution though. Seed package instructions for the timing
of planting cannot always be relied upon for accuracy.
If you're going to try your hand at starting your own plants
from seed, get yourself a good book to guide you. Every
plant has its own unique needs, and getting the timing right
for each particular plant is the key to success.
In my early
years of getting bitten by the gardening bug I spent over
$100.00 on my first seed order, had a total of 16 feet of grow
lights glowing from January through to April, and by the time
May came around I had only a dozen or so Tomato plants that
actually made it into the garden successfully.
I had started
virtually all of the seeds too early, and didn't know about
the precautions I needed to take to prevent damping-off
disease which can wipe out whole trays of seedlings.
And now to a
few current plant matters.
No houseplant
likes the drafts and dry heat of a typical Canadian home in
winter, but your Christmas Poinsettia in particular will droop
and die quickly if it can't be given a spot with a fairly even
temperature and kept out of drafts. No cold window
sills, or tables above heating vents. Keep it just
barely moist – about the state of a wrung-out sponge is ideal,
and let it dry to the touch between waterings.
Your other houseplants may be beginning to pout a bit at the indoor climate, but just like your outdoor plants they are naturally slowing down their growth for a period of winter dormancy and will liven up come early spring. As a rule, cut back on watering, especially if the plant is pouting badly or dropping leaves, and NO FERTILIZING should be done at this time of year. (More about houseplant care next month.)
Cheers! Evelyn
© Evelyn Wolf, Dec. 2003
Dirty Knees,
Nov. 30th, 2003, on fall clean-up - "best to LEAVE
DEBRIS over winter..."
There are still
a few things that could be done in the garden, but mostly late
November is the time to pat ourselves on the back with a firm
"job well done". We're grateful that our backs will
finally get a rest, but the satisfying routine of garden
"work" will be missed.
This is the
beginning of what we northern gardeners know will be an
excruciatingly long wait before we'll again be able to touch
the warm earth and experience the excitement of something new
coming into bloom.
Take heart
though! Like all gardeners, I'm an eternal optimist, so
here's the positive spin on the long five months ahead.
Our long winters offer us much more time than our southern
neighbours to become better gardeners! We have more time
than they do to read, learn, go to meetings, take classes,
write to gardening columnists, etc. and thoroughly research
plans for the coming season. We are the ones that have
the advantage!
(This forced
cheerfulness is just one of the games I play with myself to
help me cope with the long wait. I'll give you more tips
on staying sane as the winter wears on.)
So, more than ever, keep your books open and your questions coming!
Q Some gardeners just leave frost
killed plants in their garden over winter, but others say this
promotes disease. Which is correct?
A.
The best answer to this is perhaps
that happy middle ground of compromise. Basically,
the less tidying you do in autumn the better it is for the
plants, but the point of a garden is to be attractive after
all, so gardeners feel compelled to tidy.
Yet again it is
being discovered (or perhaps rediscovered) that the immense
wisdom of nature's cycles offers the best guidance for
gardeners. Successful gardening is about learning to
work WITH nature cycles and events, not trying to dominate
them.
Leaving debris
on the garden over the winter may be a hiding spot for
diseases and pests, but it is also the nurturing environment
for friendly bacteria and beneficial insects. Old stems
protect young buds from frost damage, and seed heads attract
birds who contribute droppings and foraging activity to
contribute to soil structure and pest control.
As more becomes
known about plant and soil structure, opinions on our
traditional routine of cleaning away autumn debris have
changed. It is now recognized that the battle waged
between good and evil in the garden stays in a fair balance if
we don't interfere too much.
The more you
can leave in place and still feel proud of how it looks, the
better. As with many things in life, it's about
compromise.
This year,
instead of cutting and cleaning down to bare soil, remove only
what is really unsightly or diseased, and leave at least a few
inches of old flower stem. (Powdery mildew
or Apple scab are examples of spore borne diseases that
overwinter in the soil. Burn or trash this debris, don't
compost.)
The benefits of
leaving your garden in a more natural state for the winter are
numerous. Old flower stems hold seeds above the snow
where birds can find them. Frost damaged stem fibers
disintegrate at the base by spring making them easy to just
tug away for clean up. Stems left standing and foliage
flopped to the ground act as a mulch protecting plants from
frost heave by evening-out extreme winter temperature
fluctuations.
The ground won't freeze as deeply as it otherwise would which means it will thaw quicker in spring bringing plants into an earlier growth period.
Seed heads like
the almost black Coneflower or the lovely plumes of ornamental
grasses look gorgeous poking up through the snow. The
flat heads of Yarrow and Sedum collect little poofs of snow
and contribute to a charming winter scene.
In very early
spring when the view everywhere is still brown and dull, take
a peek under the layer of debris in your garden and enjoy the
sight of fresh green growth that is already
emerging.
At this point especially, the benefits of your new relaxed attitude toward garden neatness will be the most evident. The excruciatingly long wait is almost over!
Cheers! Evelyn
© Evelyn Wolf, Nov. 2003
Dirty Knees,
Nov. 9th, 2003,
"chop leaves instead of bagging them up...",
by Evelyn Wolf
Q. I'd like to start using
all the leaves we have in our yard at this time of year in my
garden, but I've been told that they can rot and create a big
mess. Can I use them directly on my garden beds?
A. That's absolute gold falling
from your trees! Gardener's gold! Yes, you can and
should use your fallen leaves in your garden for many
reasons. All you need to do to prevent any rot problems
is chop them up a bit to increase air flow.
The fallen
leaves of deciduous trees are a major part of Mother Nature's
intricate, self sustaining system. Through this annual
cycle of shedding, rest and renewal, soil is given an annual
boost of organic matter to keep it alive and able to feed and
sustain plant life. Somehow though, we have come to
think of autumn leaves as garden "waste" that needs to be
cleaned away.
Let's look more
closely at this annual gardening ritual.
Each autumn we
put out $25.00 or more to buy extra large bags to cope with
the task of bagging leaves. Special gadgets to help keep
the bags open while you rake and stuff can also be bought for
a few more dollars. We then haul dozens of these full
bags to sit at the curb for a couple of weeks (a real
eye-sore) until yard "waste" pick up day. On this day
your tax dollars go towards paying someone around $2.00 per
bag to pick up this "waste". They then take this
precious cargo to a compost yard where it is chopped and piled
to naturally decompose. Next spring when you're working
in your garden and realize you need some compost to boost your
soil, you can go to the same compost yard where they will be
happy to sell your leaves back to you for $5.00 or more per
bag.
Personally, I'd
rather spend all this money on new plants!
Instead of
bagging your leaves this fall, put them right where they were
intended to go - in your garden to feed the soil, which will
in turn feed your plants. All you need to do is speed
along the decomposition process a bit by chopping the leaves
to make an attractive and highly nutritious mulch.
When most of
the leaves have fallen rake them into a huge pile in the
middle of your yard and go at it with your lawn mower.
Move along in circles working in from the outside edges,
aiming the exit hole of your lawn mower to the inside of the
pile so that the chopped leaves remain in a pile and are
chopped ever finer with each pass.
Most people
think that they have too many leaves for their garden to
consume, but you'll be amazed at the small mound that remains
when you're done. From personal experience I know that a
pile of 40 or more bags is reduced to just a small pile that
would fill maybe 2 or 3 bags.
Spread the
resulting rich and attractive material in a 2" blanket over
your soil and around your plants. If you have enough,
also spread a very fine layer over your lawn.
This is all you
need to do for the entire year to keep your plants well fed,
and other than the cost of a tank of gas for the lawn mower,
this gardener's gold didn't cost you a cent!
Making sure
your garden soil always has a fresh supply of organic material
is perhaps THE most important thing you can do in a garden to
ensure long term success.
The organic
material portion of the triple-mix your garden started with a
few years ago is consumed by now, and without an annual
replenishment there is no food for the worms or the millions
of other smaller micro-organisms that are an essential part of
the amazing underground chain reaction that is a soil's own
eco-system. Plant life feeds on the nutrients that
result from all of this busy underground activity.
Think of the microscopic forms of animal and insect life that live underground as your much beloved pets and garden allies that help your garden thrive. Just toss them this annual meal of chopped leaves and they will stick around and pay you back handsomely with healthy plants and plenty of blooms.
Cheers! Evelyn
© Evelyn Wolf, Oct., 2003
from Dirty Knees Newsletter, on correct
planting of newly purchased trees & shrubs.
Q.
My friend and I both bought a cutleaf Japanese maple last
summer, but hers is doing fine while mine seems to be
struggling. They were both similarly healthy when purchased.
A.
It isn't easy to diagnose plant
problems from a distance of course, but the difference between
the current state of health of your shrub, as opposed your
friend's, is probably the result of improper original
planting.
I’ll assume you watered well at planting time, but watering after planting often won’t penetrate the tightly congested root ball of a new plant that has spent the first few years of life in a pot.
Even though nursery grown plants
are healthy and treated well, life in the confined space of a
pot is not a happy one, especially for woody plants.
Roots on a sizeable container grown plant can become so
congested as they circle around the inside of the pot that
they can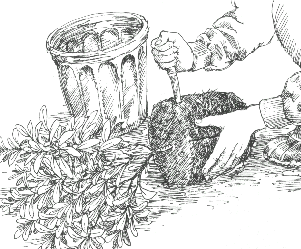 become
impenetrable - even by water. If these roots are
not untangled at planting time to let soil, water and air
reach all of the roots, only the outer roots will ever
be in contact with water and the plant will struggle for life
until it can establish a whole new network of roots outside of
this congested ball. They can suffer a lot of damage
during this period and sometimes will not make it
through. (This sounds like what your young tree might be
going through now.)
become
impenetrable - even by water. If these roots are
not untangled at planting time to let soil, water and air
reach all of the roots, only the outer roots will ever
be in contact with water and the plant will struggle for life
until it can establish a whole new network of roots outside of
this congested ball. They can suffer a lot of damage
during this period and sometimes will not make it
through. (This sounds like what your young tree might be
going through now.)
If your tree or shrub does makes
it through this phase, a different problem can emerge much
later in the plant's life if root that circled the inside of
the pot weren't untangled at planting. In a worst case
scenario, these roots will grow in girth to literally strangle
the tree or shrub's trunk base, eventually cutting off the
flow of water and nutrients. It isn't unusual for these
"girdling roots" to be the cause of poor health or death of
long established trees. (To prevent this problem in
a mature plant, at year 5 or 6ish, when the tree has
established a good new root system, cut any roots that appear
to circle the trunk at the base. Scratch 5 or 6 inches
down around the trunk and hunt for any offenders. Even
if you find a large circling root, the stress caused by
cutting it will set the plant back a bit, but it will
recover. It won't be able to recover from a girdling
root that's allowed to stay and strangle the tree in the
future though.)
The correct method for planting all new plants, especially
woody plants is as follows.
~
Prepare a hole twice the diameter
of the pot, but no deeper.
~
Fill the hole with water and let
it drain to thoroughly soak the soil.
~
Remove the plant from its pot (in
the shade!!!) and put it in a bucket of water to soak and
loosen the root ball. If the root ball is very
congested, the jet spray of your watering hose will help force
a break in the armor.
~
Separate and untangle larger
roots, especially any that are circling, even if you have to
cut them to do so. Dunk them in the water again to
moisten and loosen them further.
~
Spread roots out in the hole as
much as you can without causing damage, positioning the crown
at the correct level (no deeper than it was in the pot) then
add soil, firming as you go.
~
Leave a bit of a trench around the
base to allow water to pool and soak through the root area,
and drench thoroughly again to help soil particles settle
close to roots.
~ Leave
the trench in place for a few days and drench daily for at
least 4 –5 days. An added guarantee of success would be to
provide shade for these few days. I use an old bed linen
to just drape over the plant. This is especially helpful
if you're planting during the warmer days of summer rather
than spring.
~
After a few weeks you should see
the plant revive and begin to put out new growth. This
is the time to fertilize with a water soluble booster applied
at half strength - again, really well watered in - not just in
the top few inches. However, if you're planting in the
fall you really don't want vigorous top growth but you do want
roots well established and moist, so water well right through
until just before ground freeze up in December, but don't
fertilize until spring.
As you’ve experienced, correct
planting can mean the difference between life and death for
any shrub, let alone a sensitive cutleaf maple. For now, don’t
fertilize, water well, and cross your
fingers!
Good luck! Evelyn
© Evelyn Wolf, April, 2003